
I'm very excited today because my Little Kitchen That Could Project is getting closer to ending! I finished up the cabinets last week, and finished the faux granite painting this week. Today I'm finishing the beadboard wallpaper over the backsplash and sides of the cabinets, and then all I have left is to deal with the wallpaper border!
So anyway, onto some Faux Granite Painting.
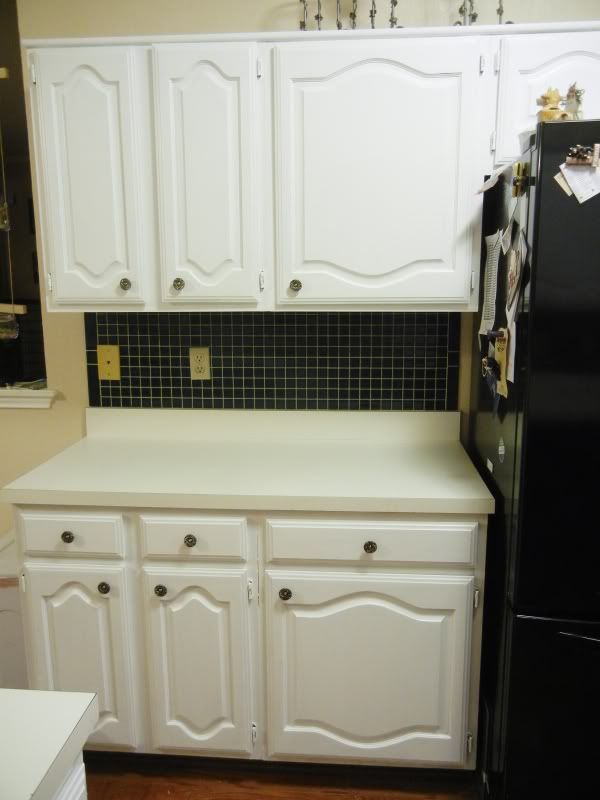
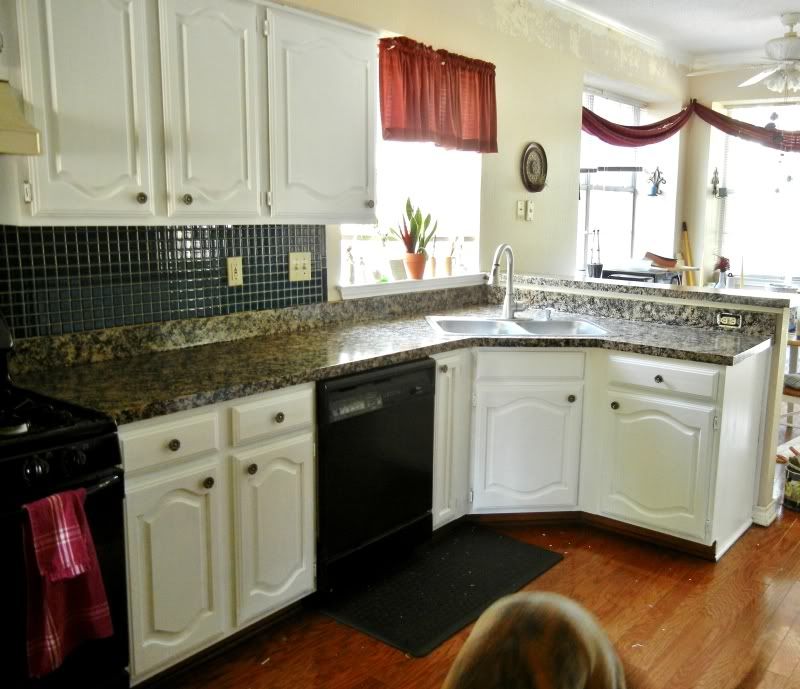
This was the countertop before; a yucky "white" laminate that turned to buttercream after I painted the cabinets white.
Yuck. Now, hover over the picture to see them magically turn to granite!
I used the Giani Granite Paint Kit in Chocolate Brown. I have seen where you can use regular latex paint, even craft paint to do this, but I wanted something foolproof and they guaranteed that for me with the kit.
This is what the kit was comprised of:

They make it easy by labeling the cans in steps. They give you clear written instructions, and two video tutorials. I even received design advice from one of their designers because I didn't know if I should go with the lighter or darker colors. The fact that they gave me the roller, the sponge, the practice sheet, and the primer and sealant sort of sealed the deal for me. The kit was only $70 and I will tell you WORTH EVERY PENNY!
Before I could start painting, I had to remove the old caulk because it was not paintable. I thought it would be difficult, but it really wasn't.
This is what I used for the caulk removal:

With a little elbow grease and the tools, it came up pretty easily. Once it was removed, I re-caulked with a paintable caulk and let it dry.

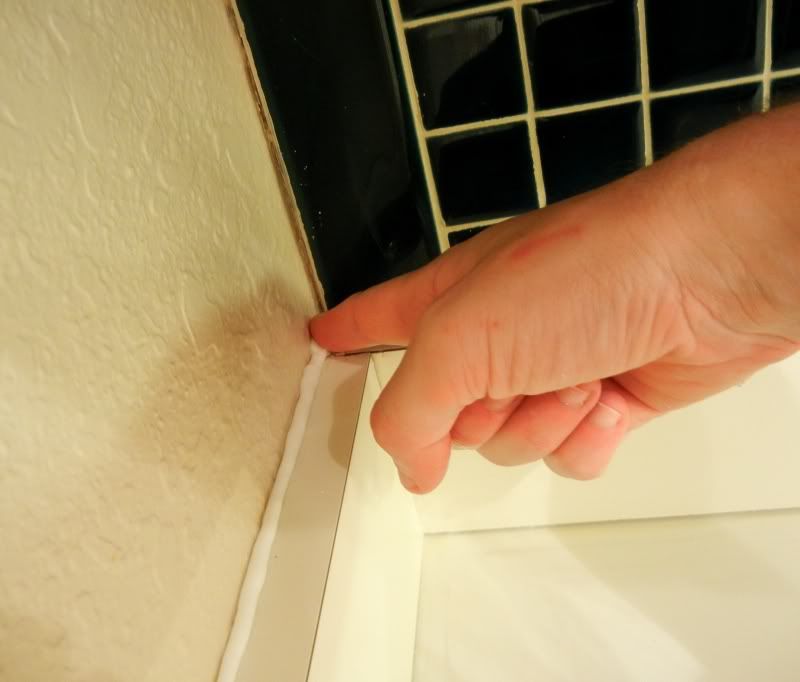
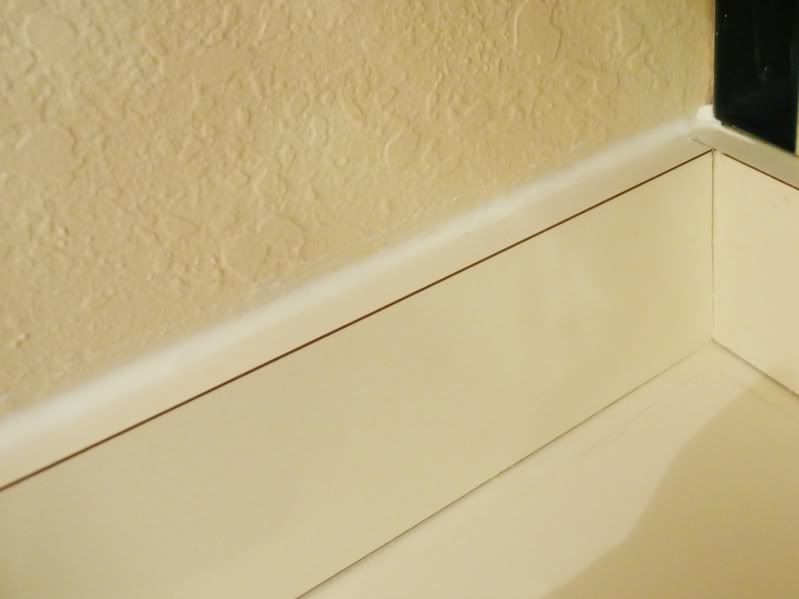
To get the smooth caulked finish, I simply used a we finger and gently pulled over the area I just did. Easy!
I taped up everything using the 3M tape for delicate surfaces to keep the paint from leaking under the tape. I used newspaper attached to the tape to shield the cabinets.
After that was finished it was time for STEP I: PRIMER. I'd be lying if I said my heart wasn't pounding and I wasn't nervous when I did that first swipe of black. It was the point of no return! This is what the counters looked like after the Step 1 Priming. My hubby walked in and had a bit of a holy $*#! moment. His comment was, "wow, they're black." I think he was worried at this point.


I let the primer dry for 8 hours as instructed before I started sponging the Step 2 Mineral Paint. Here it is going on:
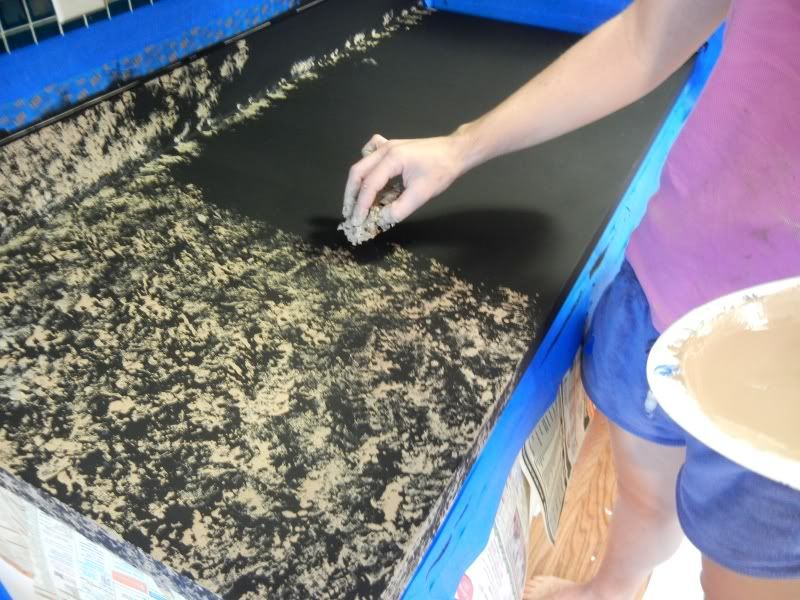
You are only to work in 3' sections going through all mineral paints so that they can blend together a bit. Here is Step 2 Mineral Paint going on over and around the first. You cannot quite see a difference, but once they start blending, and you add in the highlights, it starts to come together.
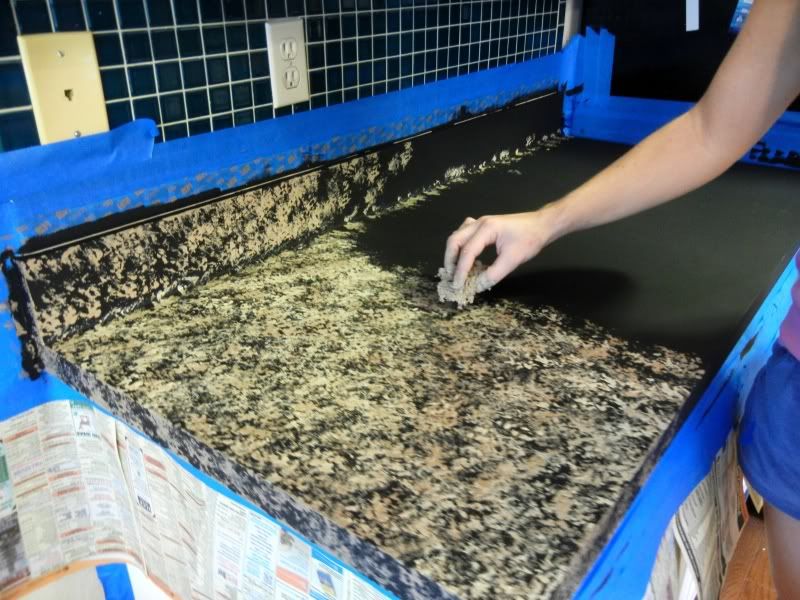
And finally Step 3 Mineral, the highlight color. I used this sparingly, just to make things pop a bit. You see me using the teeny tiny sponge piece here to get against the backsplash.


For the entire process, I actually never used the large piece of sponge. I kept with the medium and smaller sponge as I didn't want giant sponge marks, and I wanted the black to show through. As I sponged I used very light pressure, and made sure to not let it get too dry. I also rotated my hand around so that I didn't have obvious repeating marks all over the place giving away the "faux."
I let everything dry for 4 hours before I applied the first clear coat. I then let that dry for 8 hours and applied the second clear coat.
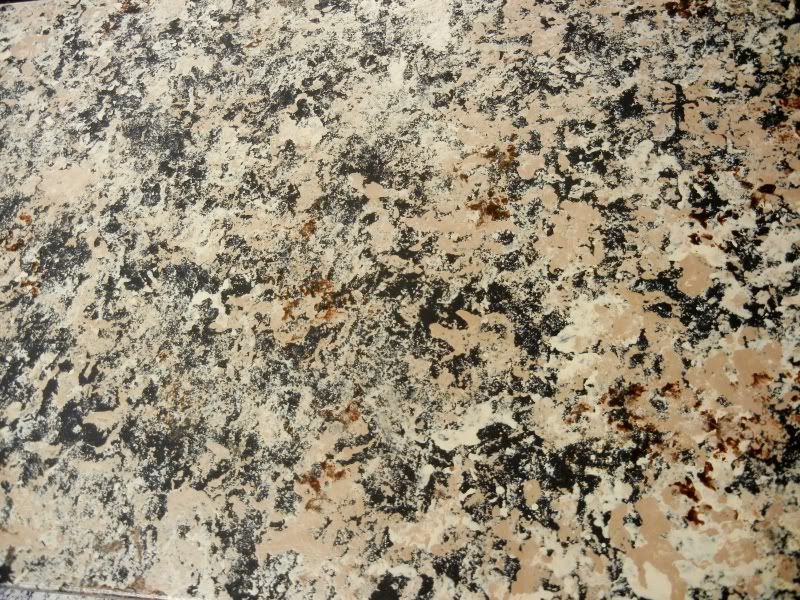
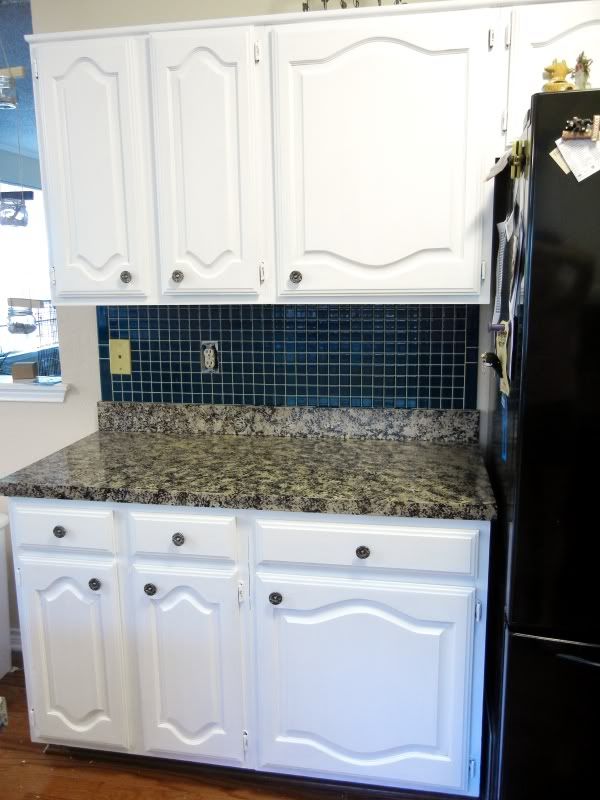
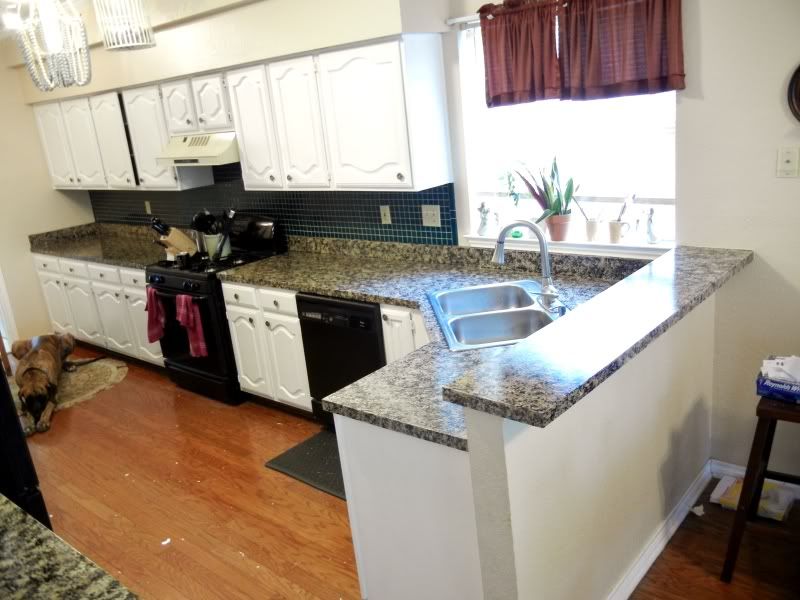
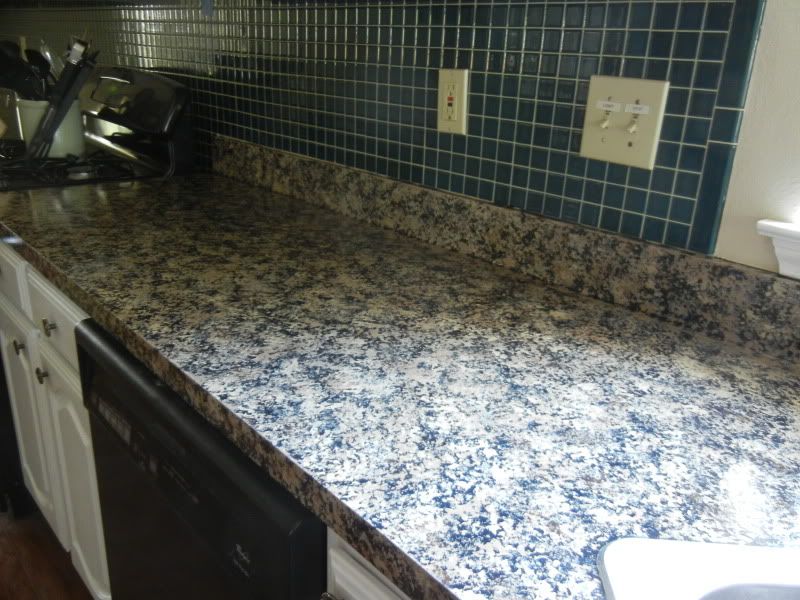
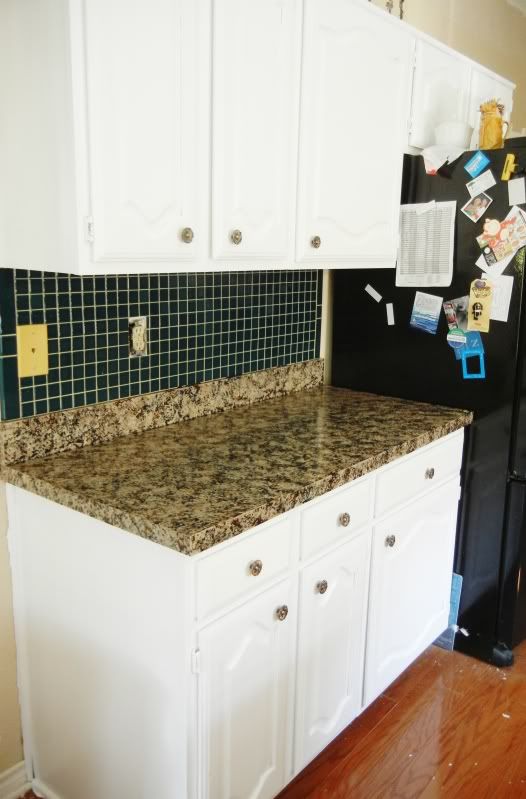
And here are the finished faux granite countertops! I LOVE THEM. They are seen below in incandescent, and natural lighting to show them off


Don't forget to enter my Giveaway for 100 Customizable Postcards from UPrinting! Giveaway ends Saturday night at 10:10pmCST!
Now, I'm off to finish up my beadboard wallpaper. Stay tuned!
PARTY!


Holy Cow! That is amazing! Fantastic job!! Found you Someday Crafts. Pop on over for a visit when you get a moment. Tootles, Kathryn
ReplyDeletehttp://thededicatedhouse.blogspot.com/2011/08/what-do-you-see.html
Its just awesome! You've totally inspired me. We've been wanting to change our countertops. We planned on tiling them with granite tiles. But after seeing this, I think we may try this first instead. Especially since we plan on renting out our home when we are ready to buy a new one.
ReplyDeleteGreat job!
How proud of yourself are you?! It looks amazing! Bravo! Can't wait to see the fully finished product! I bet your hubby changed his tune after he saw the end result of the counters!
ReplyDeletethat is amazing!!! i saw this on hgtv the other day, but have never seen anyone else do it- very cool!
ReplyDeleteGreat job there~!
ReplyDelete@Jenna (SewSavoirFaire) :) He definitely did!
ReplyDelete@Designed By Dee Thank you so much!
ReplyDeleteThis is totally fab! I'm your newest follower because I can't wait to see what you do next!
ReplyDeleteBest,
Rikka J.
Ricochet and Away!
No way! That is amazing! The creativity behind that is impressive! Great job,
ReplyDeleteI have a link party going on now, called Show & Share. I'd love to have you link this up!
http://southernlovely.blogspot.com/2011/08/show-share-2.html
Holy crap Maureen! That looks so good! It's such a nice feeling to do something that major and get to see it everyday and know that you did it yourself :) It looks great!
ReplyDeleteLove the countertops. I am thinking of paintng mine in the bathroom. I am a bit afraid of the smell though. Was this product super strong smelling? I have heard that some of them are pretty toxic.
ReplyDeleteThat's amazing! You did an excellent job!!
ReplyDelete@Carolynne No not at all! The primer smelled a bit like primer paint, but not strong to where it even made me think about it. I really loved the kit I used!
ReplyDelete@EdenSong Essentials Oh thank you so much!
ReplyDelete@mindianna <3
ReplyDeleteAMAZING! I didn't even know this product existed! I wonder it I could use that just to darken mine up a bit. Great job!
ReplyDeleteoh its beautiful! You did a great job on it!!!
ReplyDeleteYou did such an amazing job!! I am super impressed!
ReplyDeleteAudra
thekurtzcorner.com
Wow! I didn't know you could paint countertops like that. I wish I had known that in my last house! You did a great job and your tutorial was very well done. I found you via Somewhat Simple.
ReplyDeleteKrista
krista-artista.blogspot.com
Thank you all so much!!
ReplyDeleteHi Maureen...
ReplyDeleteWow...I stand in awe of you, my friend! What a project to take on...but your countertops turned out absolutely fabulous!!! I have heard of this method before but have never seen the process through photos. Loved getting to see each step! Your tutorial was GREAT!!! Well my friend, your new granite countertops look gorgeous and make a fabulous statement in your kitchen! They'll look great with the beadboard papered backsplash! Thank you so much for sharing this awesome project with us! I'm so very happy for you, my friend...you did GOOD!!!
Warmest wishes,
Chari
PS...I'm coming over via the Treasure Finds Thursday party.
WOW! They look amazing! I didn't even know that was possible! Great job! Thanks for linking up with us!
ReplyDeleteMarie
mylilpinkpocket.blogspot.com
wow...I am so impressed...this came out fabulous - pat yourself on the back!!
ReplyDeleteWhat a great transformation!! I bet that was a lot of work but it looks awesome! Thanx for linking up to Treasure Hunt Thursday! Your kitchen is truly a treasure!
ReplyDeleteWow-they came out amazing! You did a great job on them!! Would love for you to come share this at Feathered Nest Friday!
ReplyDeleteI've just been thinking about painting countertops, and wondering how they might look. Now I know they will be fantastic! Great job, and thanks for sharing.
ReplyDeleteLooks great!
ReplyDeleteYour counters look AMAZING!! I have seen a few tutorial for doing this but yours is by far the best. I did not know about the caulk issues and I did not know about the product you used. I want to do this to my counters and will most definitely be referring to this post!
ReplyDeleteStopping by from Flaunt it Friday!
Very impressive!! I need to paint my countertops (as this is the only option I can afford) great job and excellent tutorial!! I am bookmarking this.
ReplyDeleteYour counters look amazing! Wow!
ReplyDeleteYou are so brave!!, I love Mango lying on the floor!!
ReplyDeleteThanks for stopping by,
Laura
www.lifewelive4.blogspot.com
@Courtney ~ French Country Cottage Just linked up! :)
ReplyDeleteWoW is all I can say right now! I'm amazed and inspired and now so excited. I'm going to show my husband this post!
ReplyDeleteNow did you have to do any other special prep except changing out the caulk? I would also need to change out my back splash because it is basically the same as the counter top...UGH! Your cabinets are the same as mine and that was my next project to paint them...Oooooooh...I'm just so tickled to have stumbled on to this post!
AWESOME JOB!
This is gorgeous! I wish I could do this in my kitchen!
ReplyDeleteGreat job! Thanks for sharing the step by step!
ReplyDeleteWow! That looks absolutely fantastic and totally like the real deal! Your hard work paid off big time and we are so glad you shared this with us at Inspiration Friday!
ReplyDeleteVanessa
Your kitchen looks amazing! Great tutorial! Thank you so much for linking up at Savvy HomeMade Monday. We are partying again and I hope you will stop by! :)
ReplyDeleteYour cabinets turned out fabulous! Very nice job! Thanks for linking it to Home Sweet Home!
ReplyDeleteSherry
love your kitchen! It looks beautiful!
ReplyDeleteI would love it if you would share this and/or any other projects you have been up to at Tuesday Talent Show at Chef In Training Tomorrow! Plus there is going to be a fun giveaway too! Thanks so much and I hope to see you there!
-Nikki
http://chef-n-training.blogspot.com/
I featured you tonight on my blog! Thanks so much for linking up to Your Whims Wednesday, come grab a button!! :) http://mygirlishwhims.blogspot.com/2011/08/your-whims-wednesday-22-and-features.html
ReplyDeleteI LOVE how your counter tops turned out! We'll be featuring your new counters tomorrow at our {{What I Made Wednesday}} highlights. Also, you're our Sweet Blogger of the week so I've added your button to our page. Thanks for linking up and come grab a featured button!:)
ReplyDeleteBriana
http://sweetpeasandbb.blogspot.com/
Wow, that looks amazing! Congratulations on a job well done!
ReplyDelete:) CAS
WOW! I don't know how I missed this over at Pam's last week. You did a fantastic job. There really is a granite that looks just like these. I have a friend who is wanting new countertops but does not want to put out the big bucks, I cannot wait to show her your's. I am following you.
ReplyDeleteI agree it's worth the money--I have often wondered if I could achieve the results! You did a beautiful job!
ReplyDeletegail
thanks for linking up and linking back, I'm catching you this week!
I love the end result here! I like how you avoided using the large sponge. Really makes it have more of a granite look and dresses up the whole kitchen. I've been looking into doing this myself to erase the seventies look we currently have.
ReplyDeleteDid you sand the counter tops before you primed them? Or just BOOM! Primer! They look amazing, and are the new inspiration for my bathroom remodel. Thankfully, my hubby isn't too nervous about it. Yet... >_>
ReplyDeleteI would have never thought of using a sponge painting technique to make my own granite counter tops. That is a very inexpensive way to make your kitchen look like it took a long of time to make perfect. I might have to try this in my own kitchen one day. http://www.sandiamarble.com/home.html
ReplyDeleteI am in the process of doing my own countertops. Yours are LOVELY as well as your whole kitchen. My question is what sheen was your top coat? I am using a high gloss wipe on poly and after 5 coats I am wondering if it is too shiny and if I should have used Satin. Yours look nice and shiny but can't tell if mine are much more shiny.
ReplyDeleteDoes the house have to remain at a certain temperature to dry properly? You did a great job!
ReplyDeleteI wonder how long this lasts or holds up ; I know it looks gorgeous right after the work is done. But just as I hate the look of chipped nail polish, I would detest chips in my countertops.Can anyone enlighten me?
ReplyDelete